The Path to a Star
I finished fixing the hat, and I really like the result.
The Front: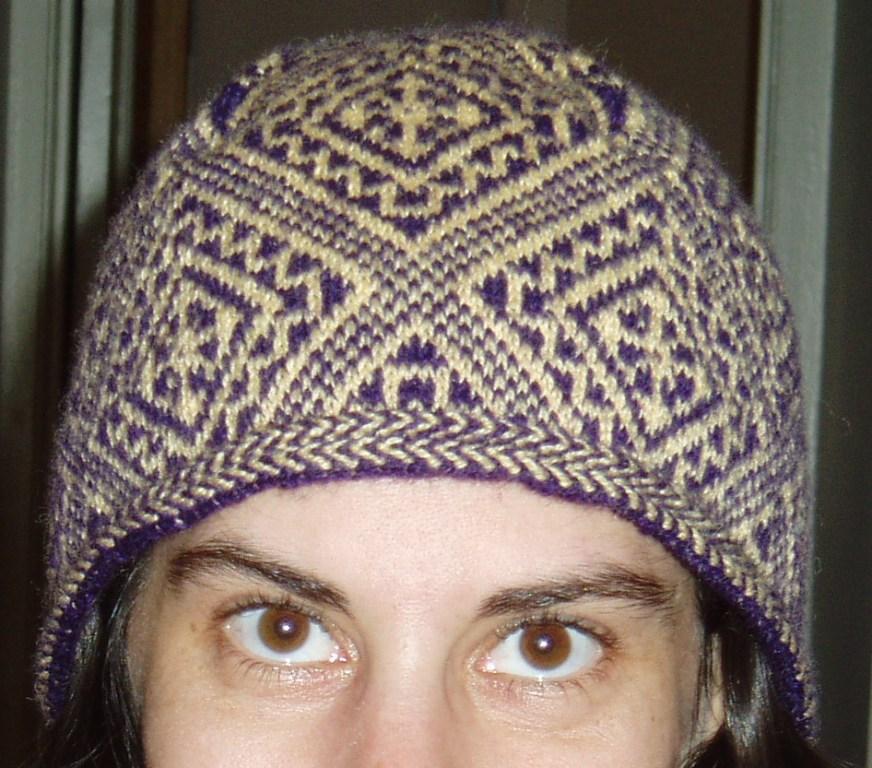
The Back: You can see the round beginning/end. It's not totally jogless, but it's good enough for me.
It looks great with the mittens, too!
Now, a little bit about the design process:
I started the project knowing only what the main body of the hat would look like. I wanted the hat to match the mittens, so the pattern was already chosen. I knew how big each repeat was, and a very small amount of math told me that I would need 5 repeats to fit around my head (22 inches total).
My first thought was to just have the tops of the diamonds meet at the top of the hat. This required me to increase 10 stitches each row. You can see the result here. This was too fast a rate of increasing, so the top of the hat would not have laid right on my head. If I had the right number of repeats (I think that the right number would have been 4, but I'm not sure) this would have worked.
So, what WOULD the right rate of increasing be, keeping in mind that the hat would need 5 identical parts? Well, the idea is to have the crown of the hat be a slightly curved (convex or concave, depending on your point of view) circle, and to have the straight part of the hat start at the same point that the straight part of your head starts.
If I wanted to make the crown be a perfectly flat circle, I would need the radius of the crown to equal the radius of the circle that the straight part of the hat makes. The circumference of the straight part of the hat is 22 inches (according to my gauge). Because 2(Pi)(radius)=circumference, I can calculate the radius to be about 3.5 inches. That means that I need the increases to "last" for 3.5 inches (or slightly more, since I want my circle to be slightly curved).
Because I know my row gauge (approx. 10 rows/inch), I decided to use 37 rows for my crown. I then needed to figure out where I was going to place the increases. There were less than 37 increase rows. I put 1/2 of the increase rows at the beginning, then increased every other row after that. I knew where in the diamond pattern I needed to stop increasing (based on knitting the mittens), so I drew that part of the pattern on graph paper. From there, it was just a matter of filling in the space above the diamond pattern. It was really just chance (and the way it works out when you place the tops of 5 diamonds together) that I ended up with a star on top. Chance can do good things for your knitting!
I hope I haven't lost you in this explanation. Part of my goal with this blog is to help people see that designing isn't really that hard, and you end up with exactly what you want. You just have to be willing to try a few things until everything works out. In the end, you'll learn a lot about how knitting works, and how garments are designed.
posted by Emily @ 6:45 PM
3 comments
![]()

3 Comments:
Beautiful hat! The fix worked really well!
Everything turned out wonderfully! And kudos to you for providing the pattern, too. Great job all around.
What's next on the needles?
Simply gorgeous hat and mittens!
Post a Comment
<< Home